Best Apps for iOS
  • Home
  • Apps
  • Tech Tips
  • Technology
  • About us
  • Contact us
@2020 - All Right Reserved.
Apps

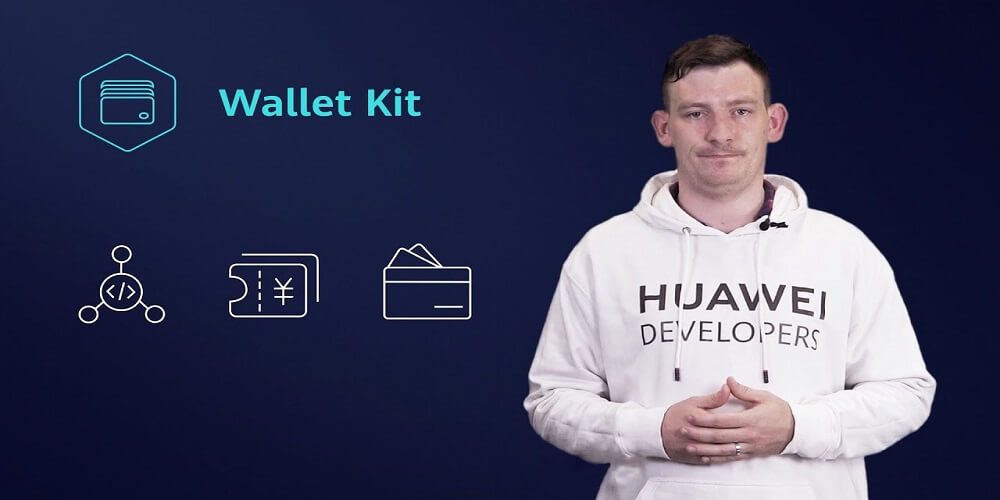
What the Future Holds With the Huawei Wallet Kit

by James Ross September 3, 2020
written by James Ross

There’s nothing better than being able to pay for all the things you want with minimal stress. This is the dream of the best shoppers and travelers around the world. With the Huawei wallet kit, things just became so much easier. Here’s why.

The Huawei wallet kit is your pass to everything amazing. From real-time updates to major changes in transactions, the Huawei’s wallet kit has impressed with no reservations.

In this article, we’re going to discuss some of the ways the wallet kit will affect our transactions now and in the future.

Payments Have Never Been Easier

The main goal of the wallet kit is to make things as easy as possible. It achieves this with its first feature. It comes with the Huawei pay feature which allows you to pay for whatever you like online. All you have to do is set up the Huawei Pay and get payments done.

The wallet kit will hold all that you need to make the payment possible.

You Can Store a Truckload of Items on the Wallet Kit

If you thought the wallet kit could only hold money, then it’s time to think again. It can hold a lot of things. From store cards to tickets, the opportunities are just endless.

It gives the old and the new industries a chance to merge and handle their payments a lot differently.

It Comes With a Global Reach

Now, all this will have just been for the show if the wallet kit was only available in a handful of countries. However, the opposite is the case.

Huawei wallet kit can be accessed in most countries in the world. In fact, it is said to be able to connect to more than 90% of devices around the world today.

So no matter where you live, the wallet kit seems to be the perfect option for you.

Huawei Puts the Finishing Touch

So here’s a finishing touch from Huawei. They have one of the best customer support around the world. This means that you definitely are not left to figure out the wallet kit by yourself. Huawei will always be there to help you get started.

Also, they have a world of resources that you should consider exploring. These resources will especially be interesting to those who are app developers or wishing to be part of Huawei.

If you own or run a company, Huawei also makes some provision for business to have a smooth transition using the Huawei wallet kit.

Enjoying a New Perspective

Excited about the Huawei wallet kit already? You probably should. It’s a whole new perspective to take in and one that is quite thrilling.

The wallet kit will open up transactions and allow you to make and finish them seamlessly. So if you want to use the wallet kit, this might be a good time to start.

The Huawei wallet kit is just getting started. Not joining the bandwagon now will be a terrible mistake. So make the right decision now while you still can.

September 3, 2020 0 comment
0 FacebookTwitterPinterestEmail
Apps

Everything you need to know about Huawei Push kit

by James Ross September 2, 2020
written by James Ross

The Huawei Push Kit is one of the best innovations brought by this leading manufacturer, Huawei. It is a messaging service that helps individuals and companies conveniently push updates and content gotten from the cloud to their users.

The main thing here is convenience. This is why a lot of people love using this kit. When you integrate the Huawei push kit during your development process, it helps you and your team constantly engage your audience and keep close ties to the users.

Most people may be hearing about this kit for the first time. This is completely fine. We will do our best to tell you all you need to know about it.

The benefits of the Huawei Push Kit

1. It is best for quality content delivery

This one of the best reasons why a lot of people love using this device. With the Push kit, users can easily access and engage with their audience at easier cost at all.

What you need when trying to grow your business online is traffic and the ability to create high-quality content that people will love. When you can provide with Huawei Push kit, you will get the best results.

2. It can be used in several languages

The main beauty of this kit is that is can be used in several languages. Most people often complain that their messages are not being passed effectively especially they are sending in English. The manufacturers of this kit have taken out time to ensure that this kit is designed to meet everybody’s needs irrespective of your language.

With this device, multilingual messaging is made simple. If you are looking to dominate globally, the Huawei Push kit is the best option for you.

3. It works in Realtime

If you need to track your delivery and open rates effectively, then working with the Huawei Push kit will be the best option for you. The kit helps you to enable Realtime receipts that can be sent to your server at any time. These receipts help you effectively track message sending.

Working with Realtime data helps you to be accurate and track important changes happening. When there is no Realtime tracking, several things could go wrong with your data.

4. You can push to a targeted audience

If you have a targeted audience, you need to use the Huawei Push kit with the HMS Core. It is because the Huawei Push kit helps you select your audience based on certain topics, tags, or combination of tags.

When you choose to target your audience, your messages get to the people that it is duly meant for on time and without hassle.

Final Words

We know that you are creating the next big technology and we implore you to take up the Huawei Push kit for the HMS Core today. Everything you need to know about the development and production is found in the development guide.

If you are trying to integrate this kit into your application, there are thousands of sample codes you can use depending on your language. You will get the best results.

September 2, 2020 0 comment
0 FacebookTwitterPinterestEmail
Apps

What are the risks of in-app payments?

by James Ross August 28, 2020
written by James Ross

You might have observed that each rose has a few thorns as well. Similarly, along with the facilities and convenient mobile payment system offers, there are certain risks as well. The level of risk is higher when you are managing the payment system yourself because there are so many other things that you have to look after in business that snatch your attention from important things. That’s why it is important if you use services like huawei in app purchase to look after your financial transactions. This allows you to focus on your sales and delivery. Let’s see why you should outsource the payment system to experts.

Cross-platform solutions

There are a variety of different operating systems and mobile devices across the world such as iOS and Android; the two being the leading operating systems. There also are thousands of network systems. This makes a rigid payment solution impractical. That’s why you need a payment solution that is adaptable to all kinds of operating systems and network systems. If you can develop a system that fits all sizes, it will be better. However, this will cost you more as you will have to build the necessary infrastructure and hire experts to execute it. Therefore, finding an expert in the industry and outsourcing payment solutions is always the best option you can have.

Security risks

This alone is enough to convince you that you should outsource the payment system. The number of data breaches is growing rapidly as more businesses are transforming their business models from physical to digital. This has made security a top concern. Even if the breaches remain restricted to data only, it is not less lethal. However, when the breach exposes the financial data of customers, it is a matter of great concern for the business owner as well. Those customers are not going to return to you. Mobile payments, in the hands of experts, remain smooth and secure. Specialized services like Huawei remain focused and dedicated to ensuring maximum security to your business transactions.

Losing share in the developing markets

The biggest factor that comes in the way of converting the business from physical to digital is that you may lose your market share in the developing countries. When you are trying to shift from a traditional set up to an app store, the likelihood is that you will have to adapt to outdated infrastructure regarding payment systems. For example, if you have added PayPal as a payment method, the chances are that a couple of countries have not yet let PayPal enter the market. In this case, you are likely to lose customers. Therefore, you should outsource the payment system to a company that offers local payment systems as well. Huawei is one such company that offers local payment systems to its clients. This ensures smooth financial transactions for your business in developing countries as well.

Mobile payment systems carry certain risks but as an entrepreneur, you have to leap across these obstacles by adapting to them. Outsourcing tricky jobs like that of payment solutions are the best choice you can make.

August 28, 2020 0 comment
0 FacebookTwitterPinterestEmail
Apps

How to Fix iPad Sound Not Working

by James Ross August 20, 2020
written by James Ross

Did your iPad’s sound mysteriously stop working? Have you lost audio while playing music or using apps? If you have no sound on your iPad, and you’ve already tried rebooting it to no avail and you know there are no headphones plugged in, follow these steps to fix the most common causes of iPad sound not working.

Unmute Your iPad to Fix Sound

There’s a Mute setting within Control Center on your iPad, which is handy, but it also means you might have accidentally turned it on if you go in there often. Or maybe you were sharing your iPad with someone else and that person enabled Mute and forgot to turn it back off.

  1. Open Control Center. (If your iPad does not have Face ID, open Control Center by swiping up from the bottom. If your iPad does have Face ID, access Control Center by swiping down from the upper right corner.)
  2. Find the Mute button (it looks like a bell) and make sure it’s not turned on, which will ensure sound is enabled on your iPad.

Older model iPads have a Mute switch on the side of the device. If you have an older iPad, check to make sure this button is off.

Check Do Not Disturb

Another setting to check is your iPad’s Do Not Disturb feature, which can also be found in Settings or in Control Center.

  1. Go to Settings, then Do Not Disturb.
  2. Make sure Do Not Disturn is not enabled. If it is already in the correct mode, it couldn’t hurt to toggle it on and off again.

Check Bluetooth

If your iPad is connected to an external device, like speakers, that means Bluetooth is enabled and your iPad itself will not produce sound.

  1. Go to Settings, then Bluetooth.
  2. Make sure this is turned off. Like in the previous step, even if it’s already off, toggling it on and off again may successfully activate sound.

Turn up the Volume within an App

Sometimes a conflict between apps is the reason behind sound not working. This could happen if you frequently go back and forth between apps. Also, most video game apps have their own volume control that’s separate from the iPad’s own volume setting.

  1. Open the app that has no sound.
  2. While in that app, use the Volume Up button on the side of the iPad to increase the app’s volume.

Reset Network Settings

If none of the above steps work, try resetting your network settings. This has been known to correct an iPad’s sound issue and it won’t erase your iPhone like a factory reset would, so it’s worth a try. It will casue your iPad to forget all Wi-Fi networks and Bluetooth devices and you will need to rejoin and re-pair.

  1. Go to Settings, then General, then tap Reset.
  2. Tap Reset Network Settings.

Mysteriously losing sound on an iPad is more common than you might think. Before cleaning the headphone jack or contacting Apple Support, give the above steps a shot. It’s likely that one of them will fix the issue.

August 20, 2020 0 comment
0 FacebookTwitterPinterestEmail
Apps

How to Indent List Items in the Notes App on the iPhone & iPad

by James Ross August 19, 2020
written by James Ross

With indentation as easy as it is on a computer, it can be frustrating to realize there’s no tab key on iPad or iPhone keyboards. If you’re like me and depend on your Notes app to organize your life, you’ll want to know the formatting options available. Nested lists in the Notes app make navigation easier and gives the option to mark tasks as partially done, and indenting blocks of text can draw attention to quotes or important items. But without an obvious option on the keyboard, how does one indent text in the Notes app? It’s easier than you think.

How to Tab on the iPhone

  1. Open your Notes app to the note you wish to format.
  2. If it’s a bulleted list, simply swipe right on the bullet you want to indent toward the right.
  3. To undo, swipe left on the bullet.
  4. If it’s a block of text, press on the part of the text you want indented until the format menu pops up above it.
  5. Hit the side arrow once.
  6. Tap Indentation.
  7. Select Increase.
  8. To reverse this, return to the formatting menu and choose Decrease. 

It is not currently possible to only indent the first line of a block of text unless there is a line break after the indented line, so this is not exactly the same as using tabs in Notes on an iPad or iPhone, but it does provide indentation where you need it.

August 19, 2020 0 comment
0 FacebookTwitterPinterestEmail
Apps

How to Avoid Getting Charged After a Free App Trial Ends

by James Ross August 17, 2020
written by James Ross

Being offered an app free trial, whether it’s a three-day free trial, one week-free trial, or even a month-long freebie, is a tempting and frequently useful offer. I watch sports exactly once every four years, so a free trial enables me to watch the few games of the FIFA Women’s World Cup that I care about without signing up for a whole platform I wouldn’t use outside of a six week window.

They’re also perfect for their intended purpose of testing out an app to see if it’s something you want to subscribe to. Unfortunately, it can also be a money drain when you forget to cancel and end up with charges on your card for apps you don’t want. Here is how to enjoy free trials without ever seeing a charge.

Cancel the App Right Away

The first thing to check is, how does the free trial work? Most apps will allow you to cancel your app subscription while still getting the free trial. If this is the case, cancel the app as soon as you download it so you don’t have to give it another thought. Here’s how to cancel an app free trial so you can continue to use it until the trial ends:

  1. Open the App Store.
  2. On the top right of the screen, tap your profile icon.
  3. Tap Subscriptions.
  4. Tap the app with the free trial.
  5. Tap Cancel Free Trial.
  6. A pop-up will appear letting you know when your trial will expire. Tap Confirm.

This will allow you to enjoy your free trial without an autorenewal at the end.

Set a Reminder

Some apps, however, will cancel the free trial altogether if you follow the steps above, and no longer allow you to use it. When this is the case, the best thing to do is to set a reminder for at least 24-hours before the trial ends. This keeps you from getting hit with a charge the day the trial ends, and avoids any ambiguous phrasing the company might have regarding whether you’ll be charged on the last day or if it’s included in your free trial. To set a reminder just:

  1. Open your Reminders app.
  2. Tap New Reminder.
  3. Enter your reminder title and description.
  4. Tap Details.
  5. Toggle Date on and select the date and time you want to be reminded. Make sure the time is more than 24 hours before your free trial expires.
  6. Tap Add.

You can also set a reminder using Siri. Just say something like, “Hey Siri, set a reminder for August 18.” Siri will ask you what you want to be reminded about and you can provide the name and details of your cancellation reminder then. Whichever way you decide to set a reminder, you’ll be notified the before your free trial is up to cancel your app.

Use a Virtual Credit Card

If you are unwilling to let the app you’re trying out have your credit card information at all, apps like DoNotPay can help you out. The service has a program specifically designed for free trials, whereit creates a virtual credit card for you to use. This means it basically creates temporary credit card information for you, similar to how chips help encrypt credit card info, that can be used only once and needs authorization.

DoNotPay will flag the charge as a free trial, and decline any charges that are sent its way. The virtual card is also short-lived, so the information will expire quickly and never be able to be used again. So not only will its monitoring decline any app charges, but your information will be kept safe from anyone trying to steal or misuse it, since the only thing the internet will see is the shell information. It’s important to note that there is no credit card fraud here, just perfectly legal data protection.

With these three tools to keep you on top of your game, enjoy all the free app trials you want without ever seeing another charge.

August 17, 2020 0 comment
0 FacebookTwitterPinterestEmail
Apps

How to Transfer Money From Apple Pay

by James Ross July 28, 2020
written by James Ross

Apple Cash, the Apple Pay peer-to-peer payment service similar to Venmo, is a quick and convenient way to send and receive money through your iPhone. A common question with this Apple Pay feature, though, is: “Can you transfer Apple Pay to the bank?” Yes! Not only is it possible, but it’s easy and efficient. Without this capability, Apple Cash would be unable to reach its potential as a full-service payment platform, and limit users greatly in how they could use the money they receive. Let’s look at how to transfer Apple Cash to the bank and get the most out of this service.

How to Transfer Apple Cash to Your Bank

  1. Open the Wallet app or tap the Wallet icon in Control center. If you are on an iPad you can find Wallet & Apple Pay in Settings.
  2. Tap your Apple Cash card.
  3. If you are on an iPhone, tap the More button.
  4. Tap Transfer to Bank.
  5. If you haven’t yet linked your bank account, enter your Routing and Account numbers, then confirm by entering them again.
  6. Enter the amount you would like to transfer, then tap Next.
  7. Select either Instant Transfer, which comes with a $0.25 fee, or 1–3 Business Days, which has no fee.
  8. Tap Transfer.
  9. A notification will pop up at the top of your screen to let you know the transfer request was successful.

You now know how to transfer Apple Cash to your bank. If you selected Instant Transfer, you will see the money in your account within thirty minutes. 1–3 Business Days will take longer but will show up in one to three business days, as its name suggests. Once you have entered your bank account info once, you won’t have to do it again.

July 28, 2020 0 comment
0 FacebookTwitterPinterestEmail
Apps

How to Turn Off the Shutter Sound on an iPhone

by James Ross June 10, 2020
written by James Ross

Some people want to know how to turn off the shutter sound on an iPhone. I like to take pictures of my cat when she’s asleep, but as soon as she hears the shutter sound, she starts to move. If you want to take nature photos without being noticed or just don’t like the shutter sound, there’s an easy way to mute the shutter. While you can turn down your volume or turn off the ringer, this tip will show you how to mute the shutter without having to adjust your iPhone’s volume. Let’s get started with how to turn off the shutter sound on an iPhone.

How to Turn Off the Camera Sound on an iPhone

The secret to turning off the camera shutter sound on your iPhone lies in your Live Photos settings; the shutter doesn’t sound when you have Live Photos enabled.

  1. Open the Camera app on your iPhone.
  2. Make sure you’re in Photo mode.
  3. If there’s a slash through the Live Photos icon on the top right, then Live Photos is disabled.
  4. To enable Live Photos and mute the shutter sound, tap the Live Photos icon.

That’s it! As long as Live Photos is enabled, you won’t hear the annoying shutter sound!

June 10, 2020 0 comment
0 FacebookTwitterPinterestEmail
  • 1
  • 2

Recent Posts

  • What is China’s Technological Environment Now
  • 2 Types Of Laptop Batteries You Should Know About
  • Do you want to increase YouTube video views?
  • How To Earn FIFA 21 Coins As A Beginner?
  • 3 Effortless Ways to Buy YouTube Views

Recent Comments

    @2020 - All Right Reserved.